How can I go LIVE to Instagram Using LIVEpigeon?
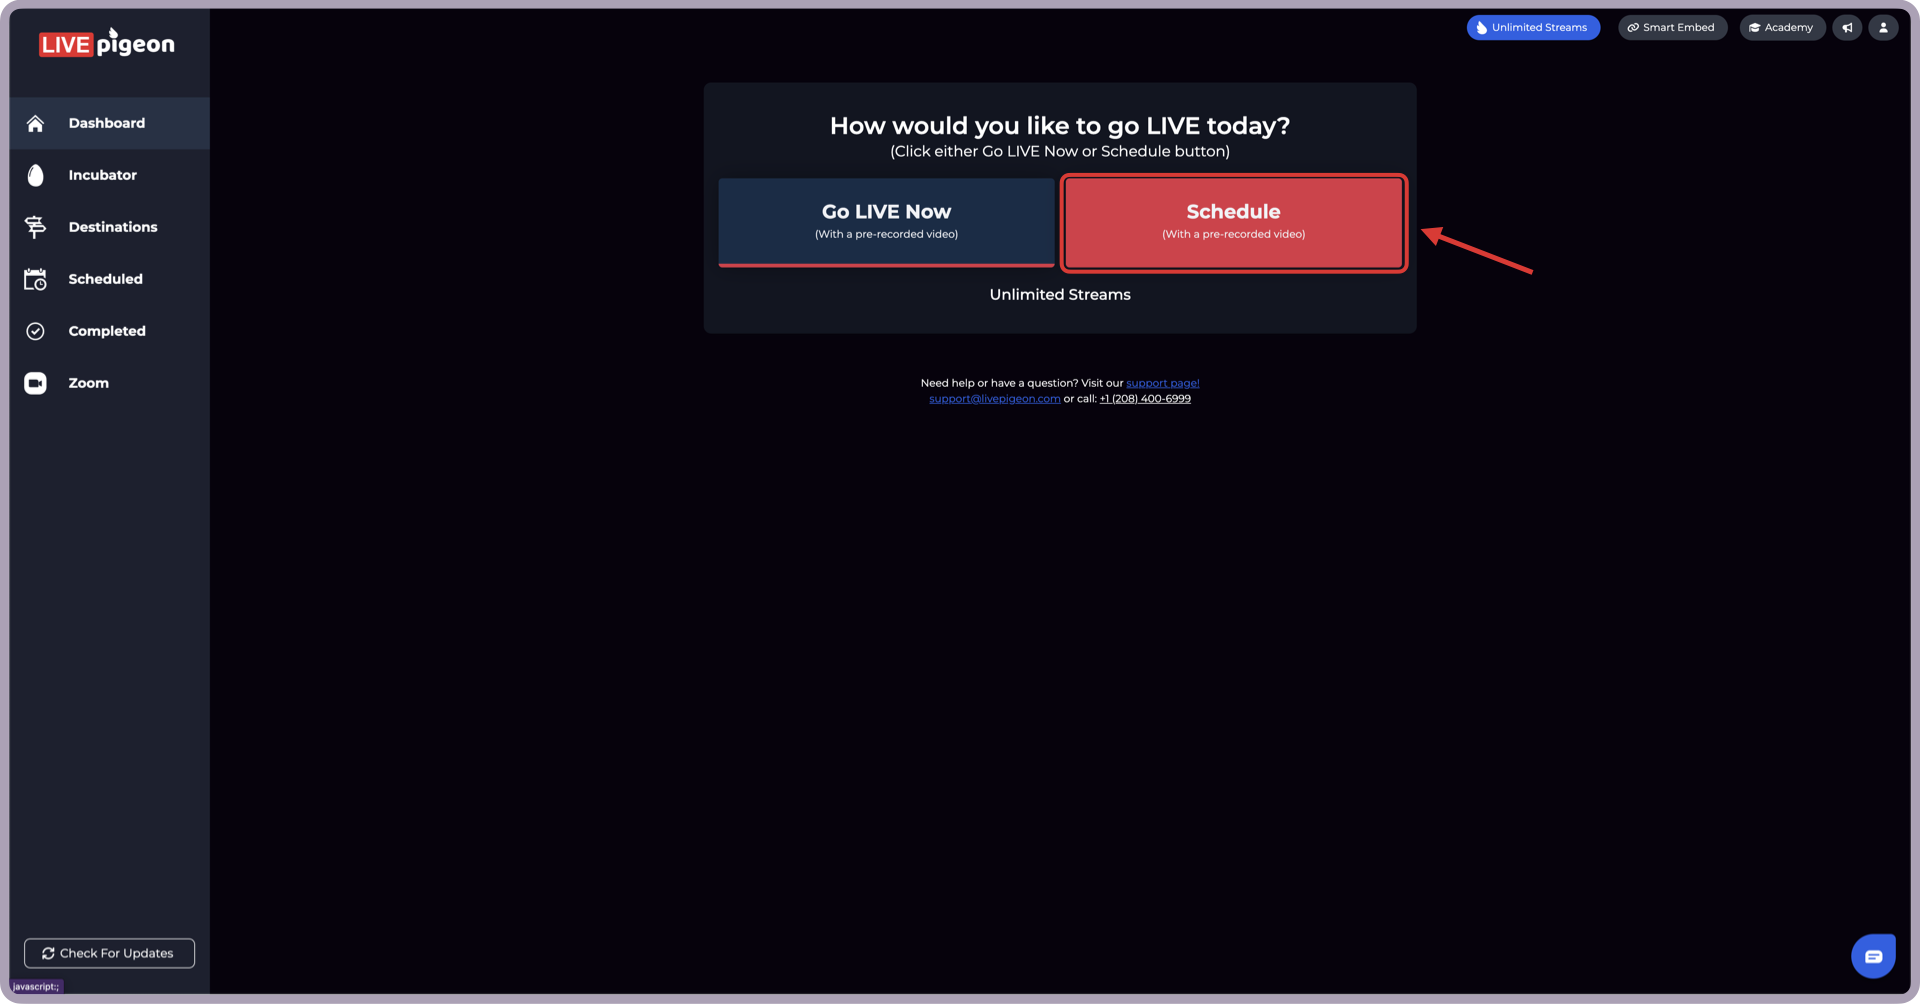
Step 1: Go to the Dashboard

Step 2: Select "Go LIVE Now" or "Scheduled"
- "Go LIVE Now" will immediately go LIVE, where "Scheduled" will go LIVE later.
Step 3: Choose time to Go LIVE
- Use the Calendar to choose the day and the clock for the time.

If you selected "Go LIVE now" in the previous step, this screen will not appear. Move on to step 4.
Step 4: Write in Title and Description
- Here is where you can write the Title and Description of your LIVE. You will need to fill this out to continue to the next step.
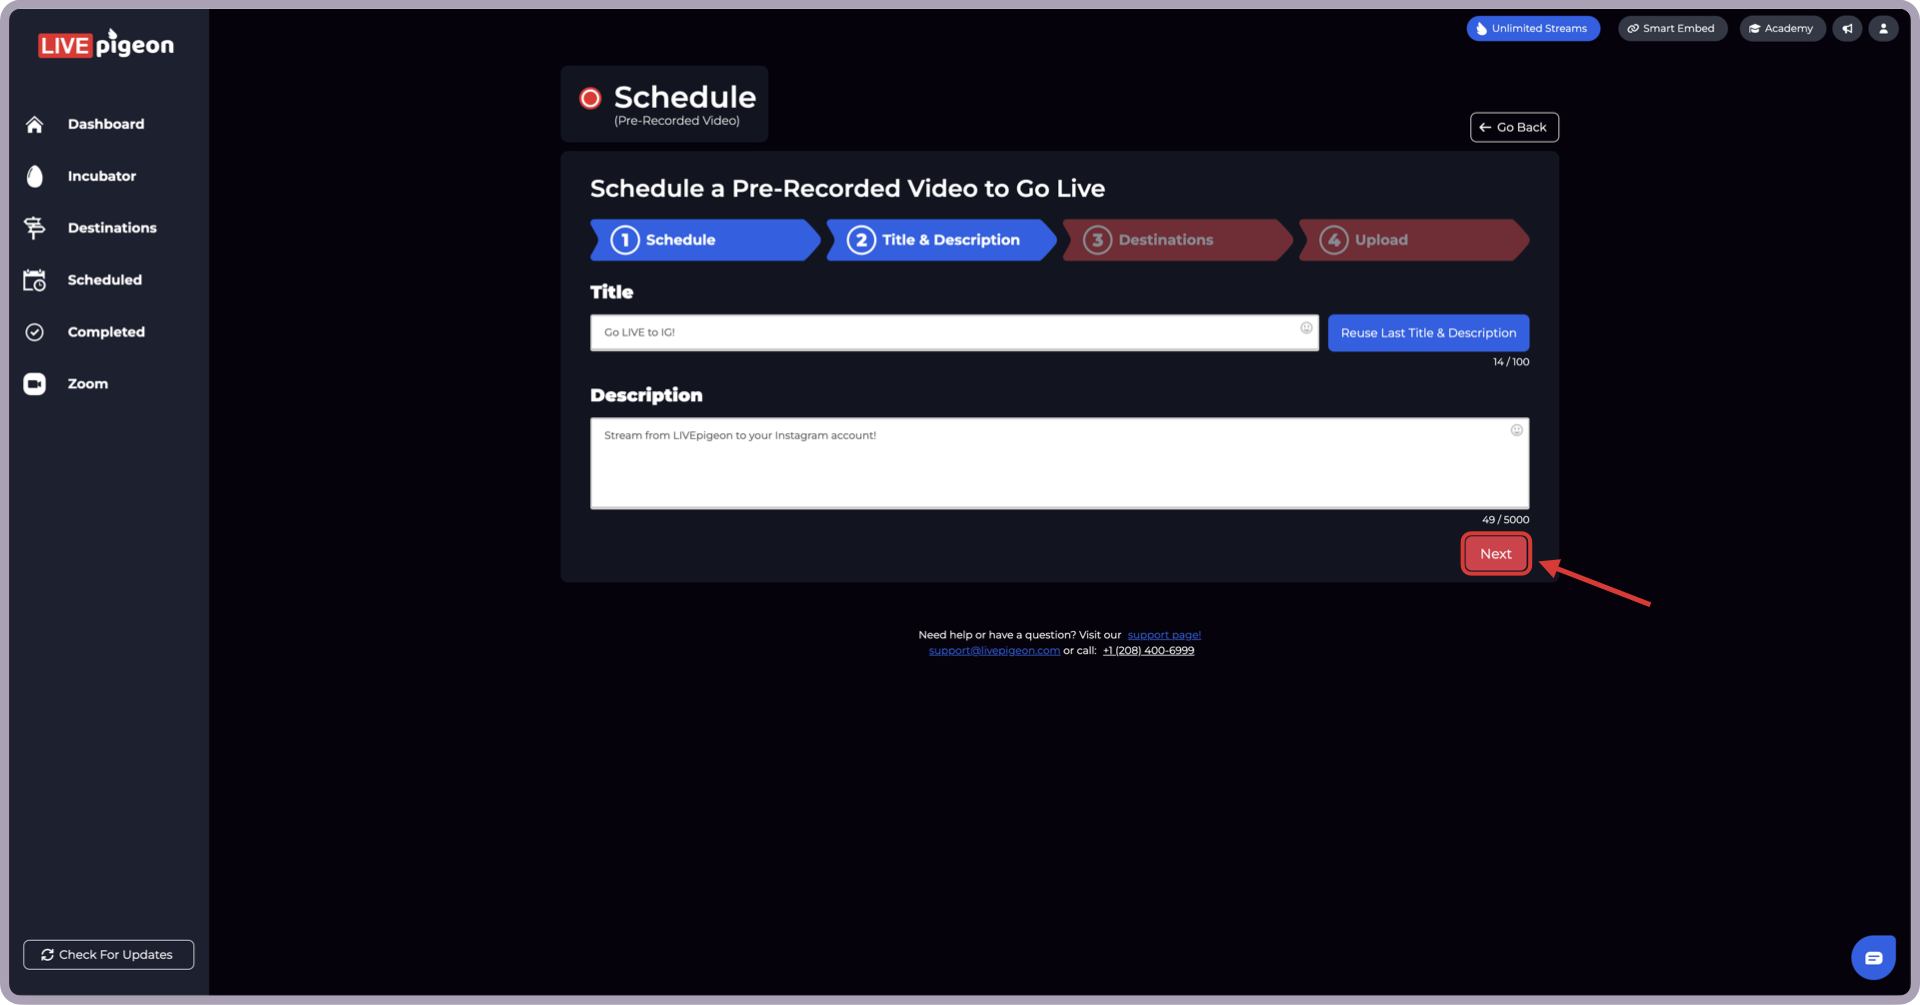
If you have trouble coming up with a good title or description, use the generate ideas button. This will give you options of titles and a description based on what you already have written.
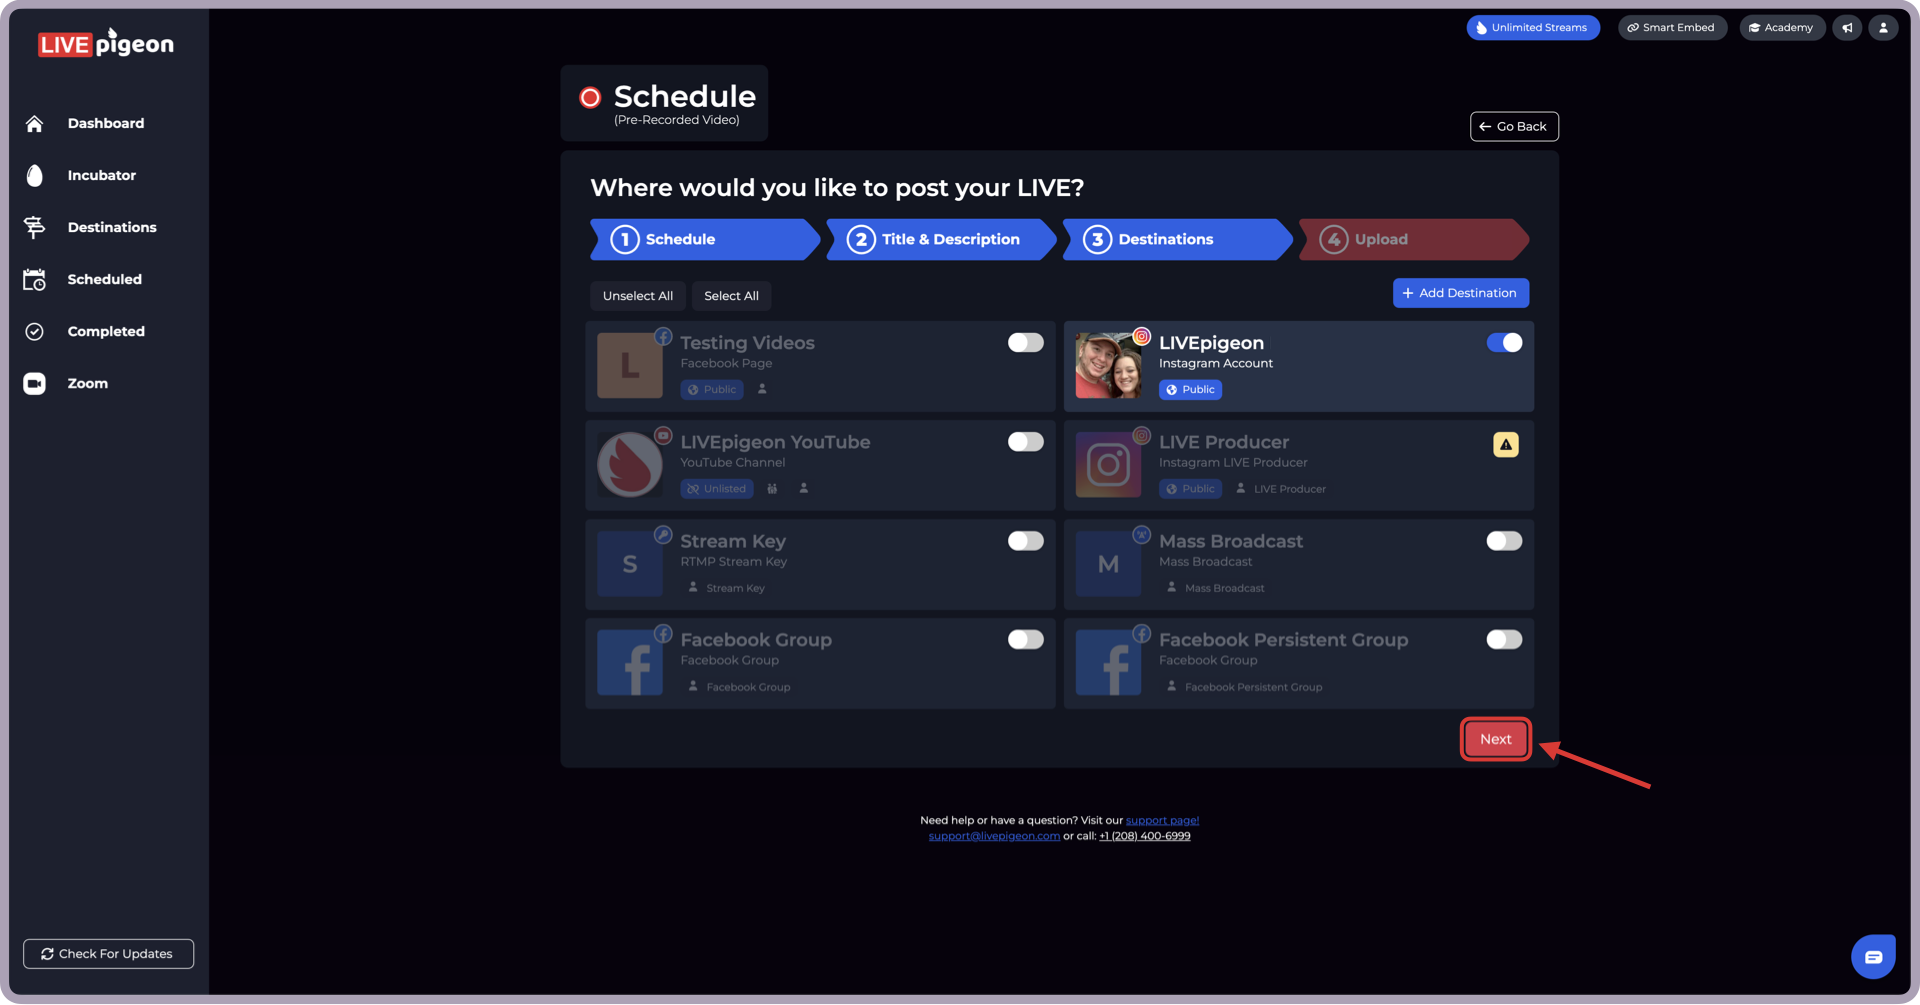
Step 5: Select the Instagram Account(s) that you want to go LIVE to
- You may choose as many destinations as you like. To add another destination, select the blue "+ Add Destination" button.
Step 6: Choose the Video you Want to go LIVE
- You upload a video by dragging and dropping it or by using Google Drive, Dropbox or the Incubator. In this example we will use the Incubator.

You have successfully Scheduled or Gone LIVE to Instagram!

We hope this article was helpful, reach out if you have any questions. We are here to help you.
If you have any more questions please do not hesitate to reach out to our support team!
(208) 400-6999 • support@livepigeon.com
